Subscription Renewal Premium
SUBSCRIPTION RENEWAL PREMIUM BY STOREPRO
Subscriptions Renewal Reminders allows you to send your subscribers a Renewal notification by Emails X days before their subscription ends

Subscriptions Renewal Reminders Plugin for WooCommerce
Are you ready to take your subscription management to the next level? Say goodbye to missed renewals and hello to Store Pro, seamless subscriptions!With our Subscriptions Renewal , you’ll never miss a beat. This powerful tool allows you to effortlessly send eye-catching renewal notifications to your subscribers X days before their subscription ends. Picture this: a perfectly timed email, landing right in your customers’ inboxes, enticing them to renew their subscription without a second thought!
Features
Testimonials
![]() 4.50 out of 5
4.50 out of 5

Unleash the power of timely renewals with our captivating email notifications
Configuring Your Plugin Settings
Download and Activate Your Ultimate Experience!
Once downloaded, activate the plugin and then navigate to the plugin settings.


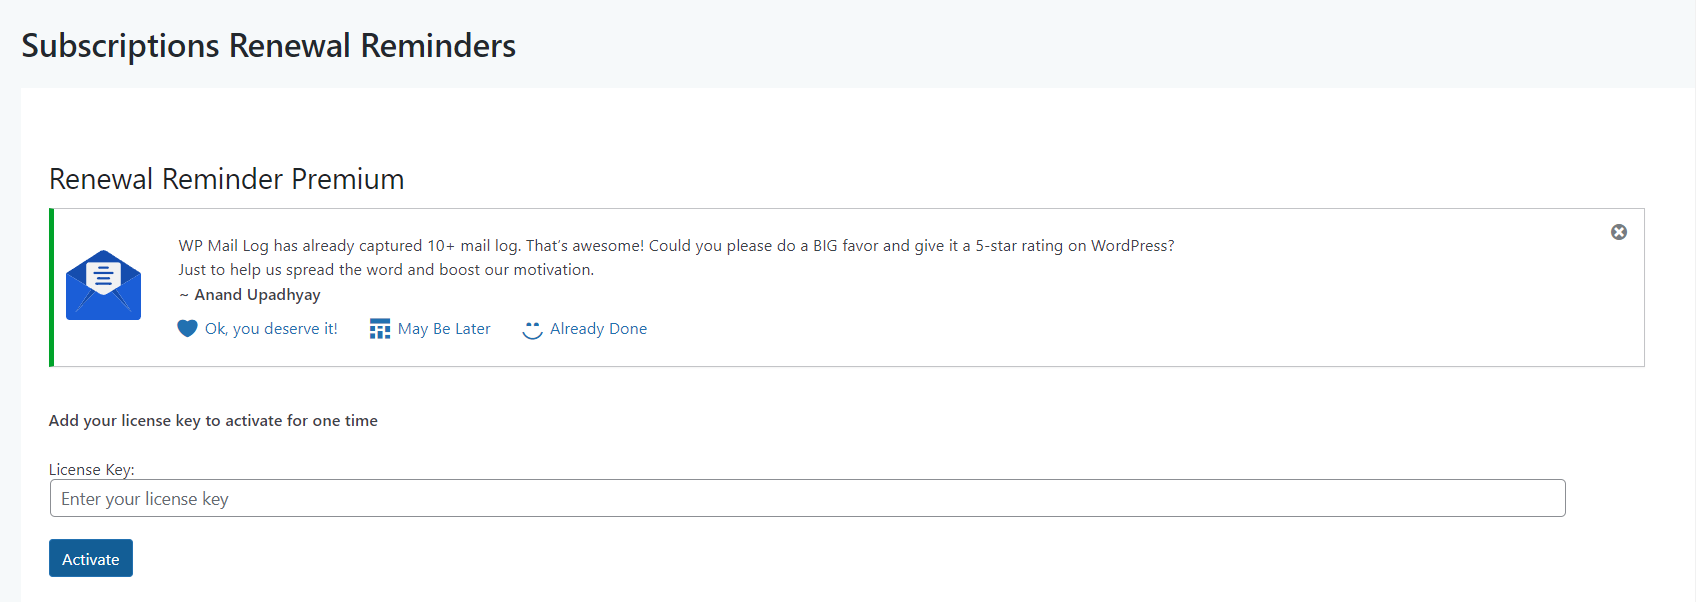
License Key Activation Made Easy
Add your license key to activate the renewal reminders for the first time.
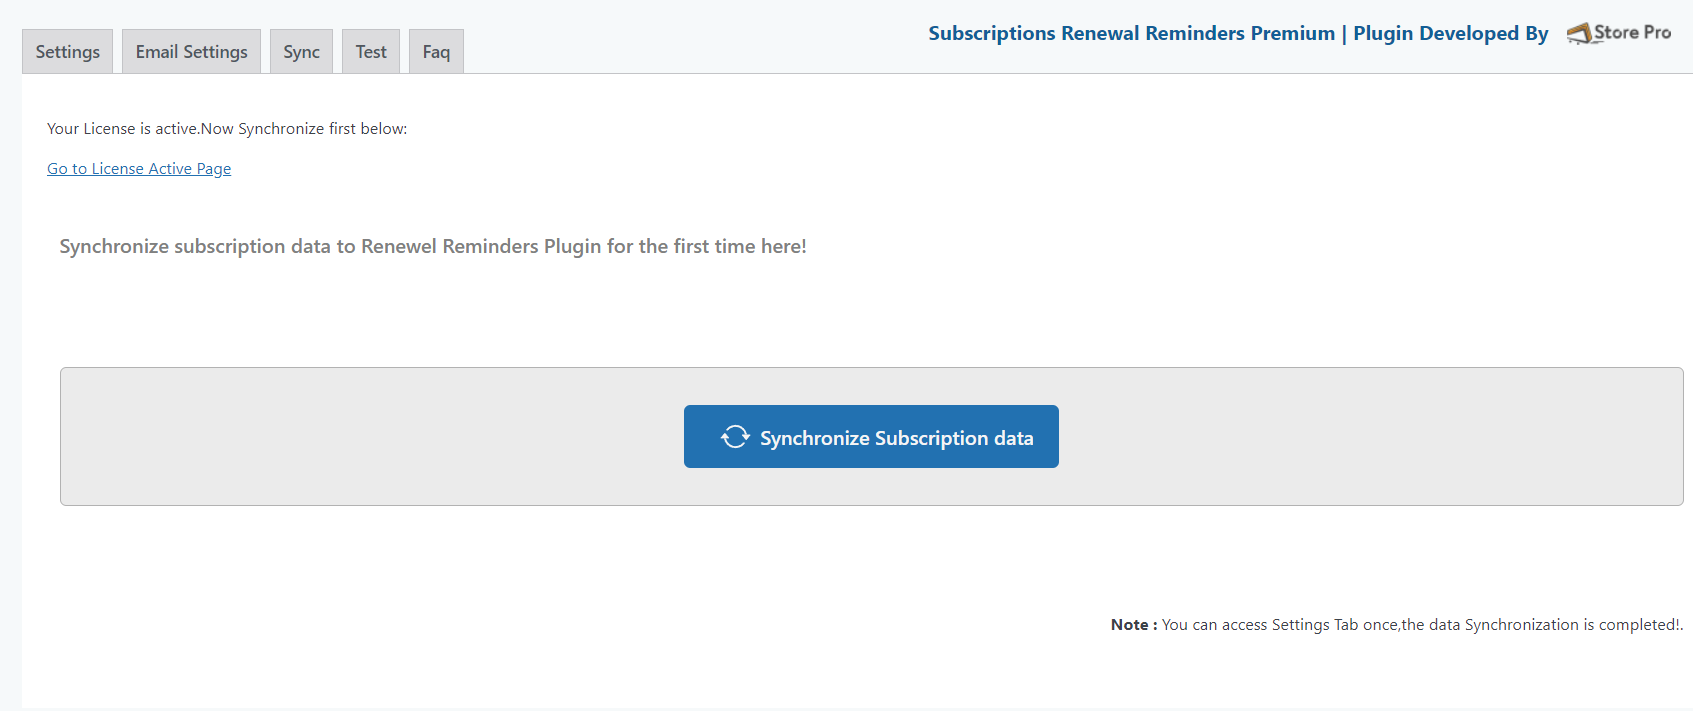
Streamline Your Subscription Data Sync for Seamless Management
Synchronize subscription data to Renewal Reminders Plugin for the first time !


Wrapping Up Your Plugin Settings
Ensure seamless functionality: Complete the plugin settings as required.
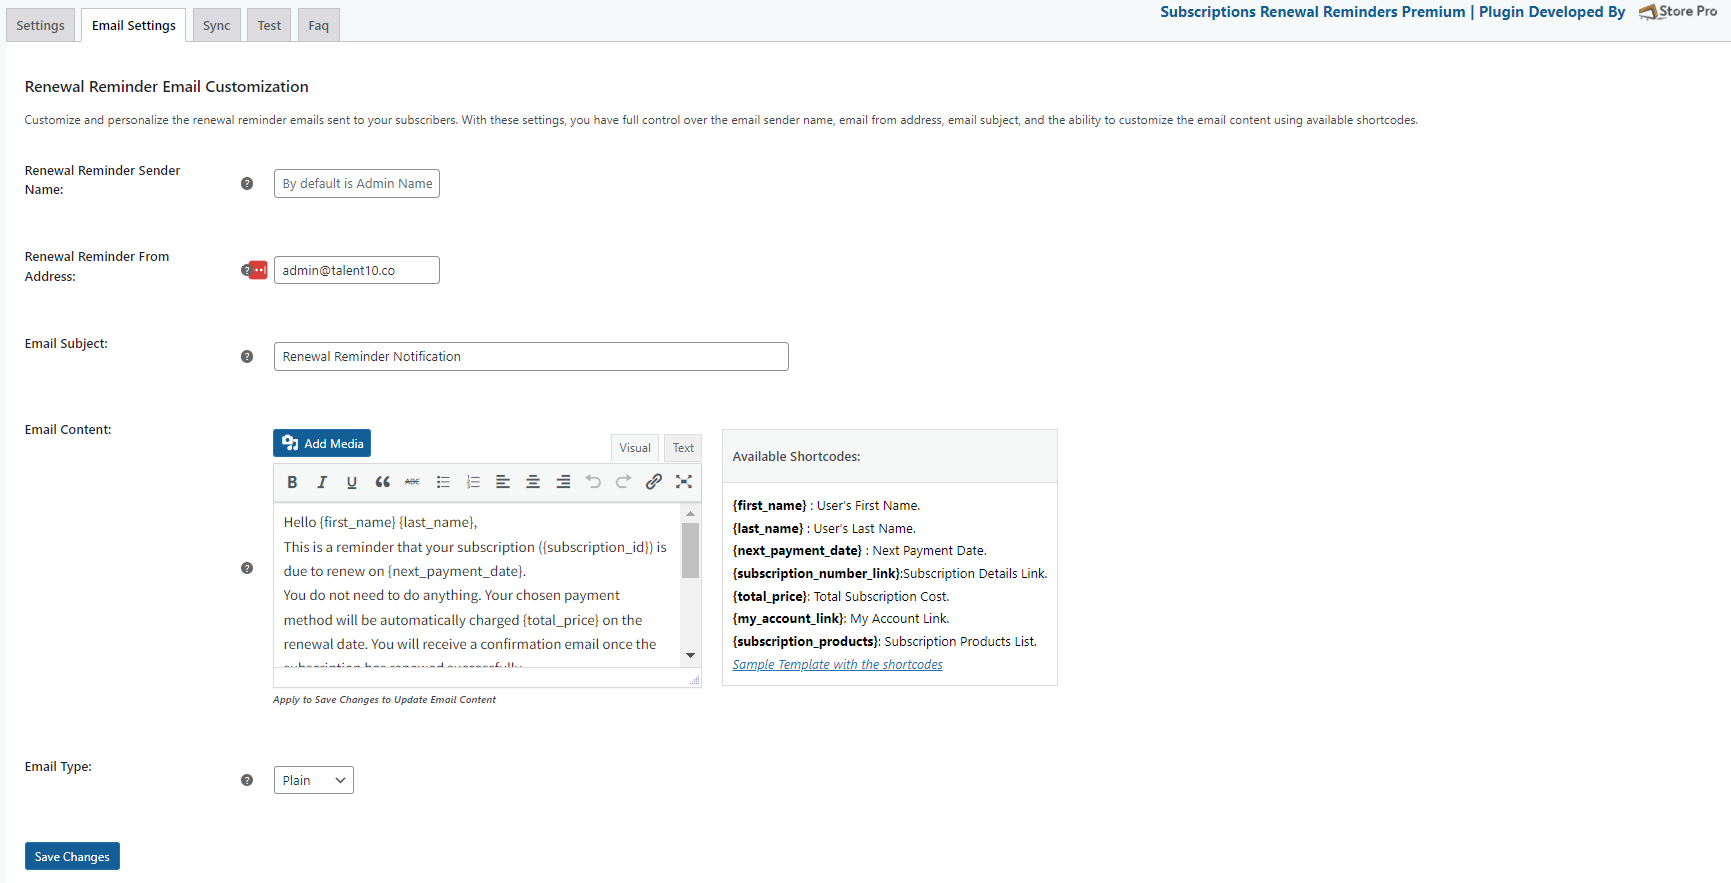
Unlock full functionality: Configure your email settings
Achieve perfection by completing email settings!

Technical Info
| Minimum version | Tested up to | |
| PHP | 7.0 or higher | 8.0 |
|---|---|---|
| WordPress | 5.2 or higher | 6.5 |
| WooCommerce | 6.0 or higher | 8.7 |
Frequently Asked Question
What should I do if the renewal reminder is not sending reminders?
If you are experiencing issues with the renewal reminder plugin not sending reminders, please follow these steps to troubleshoot the problem:
1.Check Email Service: Verify that your website’s email service is functioning correctly. Ensure that your email settings are configured properly, and test sending a regular email from your website to confirm that the email service is operational.
2.Enable Cron Job: Make sure that the Cron job is enabled on the server side. Additionally, check the wp-config.php file to ensure that the Cron is not set to “false.” A functioning Cron job is crucial for scheduled tasks, including the automatic sending of reminders.
3.Manually Sync Subscriptions: In the renewal reminder plugin settings, there is usually an option to manually sync subscriptions. Try triggering the synchronization manually to ensure that the plugin is fetching the latest subscription data.
4.Check WP Mail Log: Enable the WP Mail log to monitor outgoing emails from your website. This log will help you determine if the renewal reminders are being sent or if there are any errors in the process.
5.Enable Debug Log: Enable the debug log from the plugin settings. This log will provide valuable information about any issues or errors occurring within the plugin. If you encounter difficulties, share the debug log with our support team by emailing us at [email protected]. If you have completed these steps and are still encountering issues with the renewal reminder plugin, please reach out to our support team at [email protected]. Our team will investigate the problem from our side and provide further assistance.
Can I modify email contents of the Renewal Reminders plugin to suit my preferences?
Yes, you can easily customize the email contents for the Renewal Reminder plugin by using the provided filter functions. To achieve this, follow these steps:
1.Access Theme Functions or Create a Custom Plugin: First, access your theme’s functions.php file or create a custom plugin where you can add the filter functions.
2.Use Filter Functions: Add the following filter functions to your theme’s functions.php file or custom plugin:
a. add_filter('sp_head_content_filter', 'my_custom_head_content_filter', 10, 3);
b. add_filter('sp_body_content_top_filter', 'my_custom_body_content_top_filter', 10, 3);
c. add_filter('sp_body_content_inner_filter', 'my_custom_body_content_inner_filter', 10, 3);
d. add_filter('sp_body_content_bottom_filter', 'my_custom_body_content_bottom_filter', 10, 3);
3. Customize Email Contents: Now, you can define your custom functions to modify specific parts of the email content using the filter functions. The filter functions mentioned above provide different entry points where you can customize the email content:
sp_head_content_filter Customize the content for the email’s head section.
sp_body_content_top_filter Customize the content for the email’s top section.
sp_body_content_inner_filter Customize the main body content of the email.
sp_body_content_bottom_filterCustomize the content for the email’s bottom section. You can use these filter functions to add or remove content, change styling, or insert dynamic data into the email. The third parameter (usually $data) passed to the filter functions contains information about the email, allowing you to make dynamic modifications based on the specific email being sent. Please note that customization through filter functions requires some coding knowledge. If you encounter any challenges during the process, feel free to seek assistance from a developer or our support team.
Is there a way to preview the email templates before sending them through the Renewal Email plugin?
Absolutely! You can easily view the email template content before sending it by utilizing the “Test” function provided by the Renewal Email plugin. Here’s how you can do it:
1.Access Email Settings: Firstly, access the settings section of the Renewal Email plugin within your WordPress dashboard.
2.Configure Test Email: In the email settings, locate the “Test” function or “Send Test Emails” option. It typically allows you to enter an email address in the “To” section.
3.Select Subscription: Next, choose a specific subscription or use a sample subscription from your Subscription forms. This will help you test the email template with real data.
4.Click “Send Test Emails”: After setting up the email address and selecting the subscription, click on the “Send Test Emails” button. The plugin will then generate a test email using the email template, and it will be sent to the specified email address.
5.Review the Email Content: Check your inbox for the test email. Open it to view the actual content of the email template. This will give you a preview of how the email will appear to recipients.
6.Make Additional Changes (if required): If you need to make further changes to the email template, you can go back to the email settings and customize the content based on your preferences. Using the “Test” function is a great way to ensure that your email templates are set up correctly and look professional before sending them to your subscribers. It allows you to verify the layout, styling, and dynamic data integration in the email, making it easier to fine-tune the templates as needed.
Can I modify the periods at which renewal reminders are sent for WooCommerce subscriptions?
Yes, you can customize the periods for sending renewal reminders in WooCommerce Subscriptions by using the provided filter function. Here’s how you can do it:
1.Access Theme Functions or Create a Custom Plugin: To begin, access your theme’s functions.php file or create a custom plugin where you can add the filter function.
2.Add Filter Function: Add the following filter function to your theme’s functions.php file or custom plugin: function sprr_subscription_frequency_filter($frequency) { // You can modify the array of subscription frequencies here if needed // For example: return array(‘day’, ‘month’, ‘year’); return $frequency; } add_filter(‘sprr_subscription_frequency’, ‘sprr_subscription_frequency_filter’);
3.Customize Subscription Periods: Now, you can customize the subscription periods by modifying the array of subscription frequencies within the sprr_subscription_frequency_filter function. The filter function allows you to adjust the reminder periods based on your specific requirements.For example, if you want reminders to be sent every day, month, and year, you can modify the function like this: function sprr_subscription_frequency_filter($frequency) { return array(‘day’, ‘month’, ‘year’); } add_filter(‘sprr_subscription_frequency’, ‘sprr_subscription_frequency_filter’); Adjust the array elements as needed to set your preferred periods. Available options include ‘day’, ‘week’, ‘month’, ‘year’, and any other custom periods you may have defined.
4.Save Changes: After adding the filter function and customizing the subscription periods, save the changes to your theme’s functions.php file or custom plugin. By using the provided filter function, you have the flexibility to modify the renewal reminder periods for WooCommerce Subscriptions according to your business needs. This allows you to align the reminders with your subscription plans and customer preferences.
Is buying a plugin a one-time charge?
The plugin license comes as a 12-months subscription. The license is valid for one year and will renew after that automatically unless canceled. You can use the plugin for lifetime, but support and updates of the plugins will be available as long as the license is active.
What happens if the License expires or is deactivated?
If your license expires, you can still use the plugin on your site for as long as you like but you can no longer access the file for download or receive support or updates for the plugin.
How often are the plugins updated?
We update our plugins frequently. This could be when we introduce a feature or fix a bug. View the changelog on the product page to check the latest version.
How do I download the plugin files after the purchase?
Once your order is complete, you should receive an email notification with a download link. You may also go to your account page and click the Downloads tab to find all available products.


