

How to Add Price Filter in WooCommerce
How to Add Price Filter in WooCommerce
It’s very rare that customers come to an online store with an exact idea of the product they want to buy. Usually, they search for the type of product they want and go through the search results to find a product that matches their requirement. That is why you need a powerful search functionality in an online store, including a WooCommerce price filter.
But that is not enough. There would be hundreds of products, but most of them won’t meet their requirements. So, customers would also want an option to filter the products by specific details like the category, price, rating score, size, colour, etc. For example, a customer who wants to buy a shoe from an online store but the maximum price the customer is willing to pay is $100. So, when he/she searches for shoes, he may want to filter only the shows that cost below $100 using a WooCommerce price filter.
Product filtering functionality is an essential component of user experience in the online store. It makes their online shopping experience way better. However, WooCommerce doesn’t offer this functionality by default despite it being one of the most popular eCommerce platforms.
In this blog, I am going to show you how to add a woocommerce price filter option in your WooCommerce store.
eCommerce Product Filtering Best Practices
As mentioned earlier, product filtering functionality is crucial for delivering a good experience to the customers. But simply adding the functionality is not enough. It should really help the user to filter out the product they would like based on the various parameters of the products, such as a WooCommerce price filter.
Price is only one parameter to filter the products. You can also filter products based on any product parameters like colour, size, rating score, and brand. So, in this blog, we will also show you how to add the category to the filtering function because it is one of the most common filtering parameters that apply to all types of products and online stores. Combining both category and WooCommerce price filter options makes it even easier for users to discover relevant products quickly.
Install WC Product Filter
Open the WordPress admin dashboard of your WooCommerce store and go to Plugins > Add New. Search for WC Product Filter in the search field and install the plugin by Themify. After the installation, don’t forget to activate it.
Once you activate the plugin, you can see a new Themify added an extra menu, Product Filters, in the left sidebar in the WordPress dashboard. Click on it to go to the plugin configuration page and begin setting up your WooCommerce price filter and other filtering features.
Create New Product Filter
Click on the Product Filter menu in the left sidebar to go to the WC Product Filter configuration page. If you see two submenus under Products Filters like in the following screenshot, ensure that you have opened the Product Filters submenu.
If there are no two submenus, it’s all right. You should be on the right page.
Click on Add New button to create a new product filter.
Now you can see a form pop up. Start filling it out to create your first product filter.
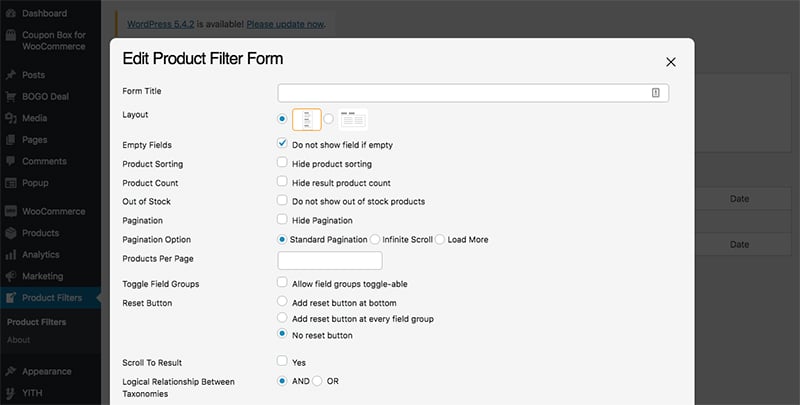
In the Form title field, enter a name for the product filter. E.g.: Primary Filter
For the Layout, choose either vertical or horizontal.
If you have a sidebar in the product archive and shop pages, the vertical layout is great.
If you don’t have a sidebar in the product archive and shop pages, the horizontal layout is the one you should choose.
Empty Fields
It allows you to choose to show or hide a field if it is empty. It’s better to keep it checked.
Product Sorting
It allows you to choose if you want to show or hide the product sorting option. You can keep it checked or unchecked as you wish.
Product count
It allows you to show or hide product count. Keep it checked or unchecked as you want.
Out of stock
It lets you choose whether you want to show or hide out of stock products
Pagination
It lets you show or hide pagination
Pagination option
Standard pagination is the regular pagination with page numbers. Infinite scroll pagination displays all products in a single page but the bottom items will be loaded only when the customer scrolls to the bottom. Load more pagination adds a load more button at the bottom to show more products.
Choose whichever option you like the most.
Products per page
Enter the number of pages you want to show on one page.
Toggle field group
Enabling the toggling option allows users to toggle field group
Reset button
You can either have a single reset button for the entire filters, reset button for each filter, or no Reset button. It’s better to choose the add reset button at every field group option.
Scroll to result
It allows you to choose whether the plugin lets you scroll down to the result or not. It’s better to keep it unchecked.
Logical Relationship Between Taxonomies
Choose AND if you want the plugin to filter the products that match all filtering rules. The OR option will filter the products that match at least one filter rule. In most eCommerce websites, AND logic is used.
Result page template
In most scenarios, showing the results on the same page is the best option.
No product found message
This message is displayed when no product matches the filter rules.
Add Category and WooCommerce Price Filter
At the bottom of the form, you can see a list of filters this plugin supports. We are planning to add the Category and WooCommerce price filter options in our shop. Let’s start with Category first.
If you don’t want to add the category filter, you can skip this and continue to the Add price filter section.
Drag the Category filter to the empty area.
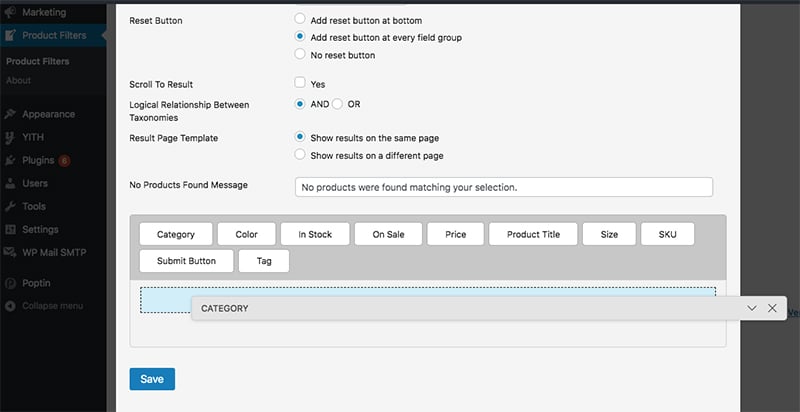
Now you will be presented with a bunch of settings for the category setting. Since it’s not the main focus of this blog, I will not explain each setting. They are self-explanatory so you can manage it on your own.
The two settings I would like to recommend are Field title and Display as. Enter Category in the as the Field title and choose Checkbox option for the Display as setting. Default options are good enough for the remaining settings.
Add Price Filter
Minimize the CATEGORY filter settings by clicking the small down arrow at the right. It’s optional but it allows you to hide the settings for Category filter so you can have a better view of the entire form.
Then drag the Price filter from the top to the bottom of the category.
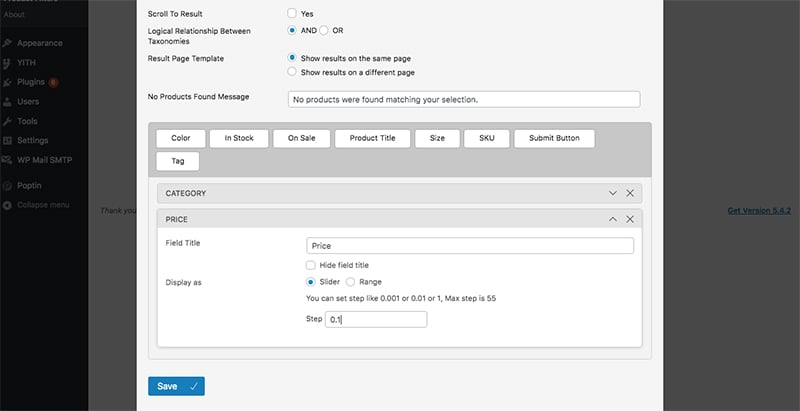
Enter the word “Price” as the Field title for price filter option.
Save the Product filter
You have successfully added two filter groups to the product filter: Category and price. Now click on the Save button to save this Product filter. After clicking the Save button, click on the X button at the top of the form to close the popup form.
The next thing you need to do is adding this Product filter to your online store.
Copy the shortcode of the Product filter
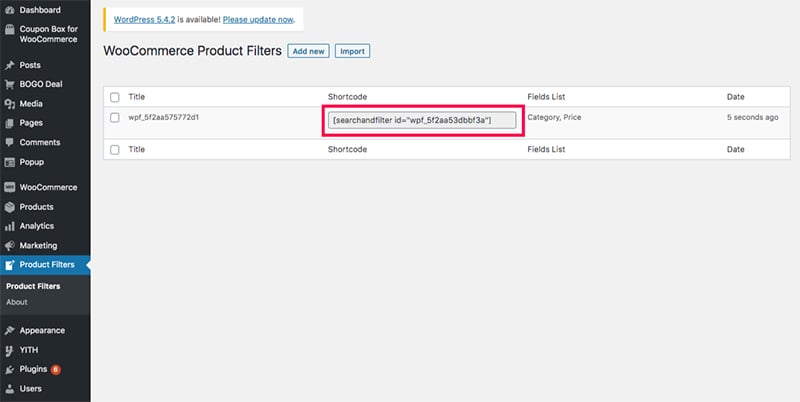
When you close the popup form, you will be taken back to the WooCommerce Product Filters page where you can see the Product filter you have just created. You can go to this page by clicking the Product Filters menu in the left sidebar.
You can add this Product filter using the shortcode of this filter. So, copy the shortcode of the Product filter.
Add WooCommerce Price Filter in Sidebar
If you have a sidebar in your Shop, product archive, or product catalogue pages, you can follow along. If there is no sidebar, you can skip this section.
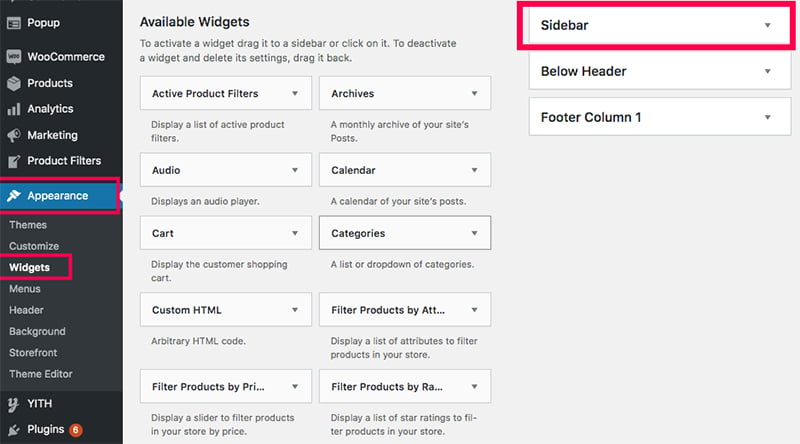
Go to Appearance > Widgets to go to the Widgets page.
In the Widgets page, you can see Sidebar in the right along with other widget areas. Click on the down arrow icon to the right of Sidebar to expand it.
If there are already widgets under the sidebar, you can delete them or keep them as you wish.
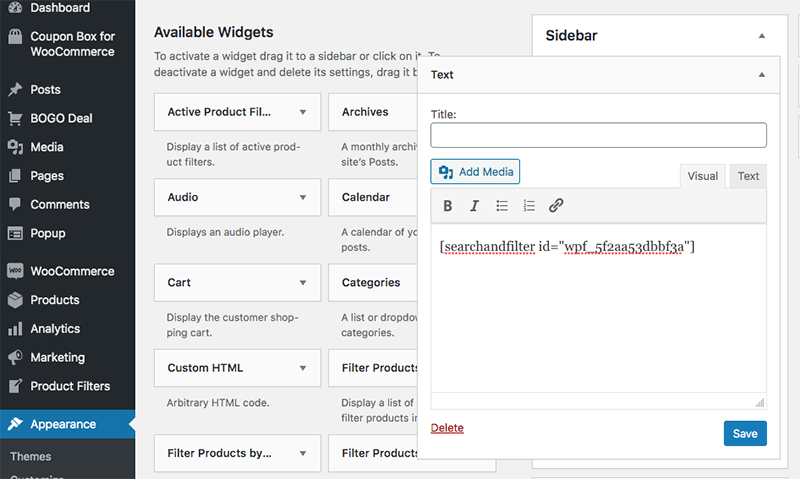
Now drag the Text widget from the Available Widgets section to the Sidebar widget area. Now it will ask you to enter a title and content.
You can leave the Title empty.
In the content field, paste the shortcode you copied in the previous step.
Then click on the Save button to save the changes you made in the Sidebar widget area.
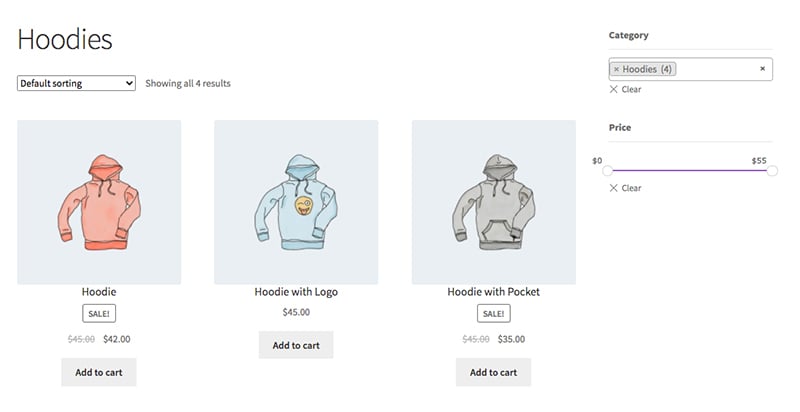
Now if you open your online store and go to the Shop or Product catalog page, you can see the filter functionality.
If you want to make some changes to the filter functionality, you can go to the Product Filters page, choose the Product filter and edit it as you wish.
Add Filtering functionality at the top of the Product listing
If you don’t have a sidebar in your Shop and Catalogue pages, you may want to display the Filter options at the top of the products section. There is no single right way to do this because it depends on how your WooCommerce website is created.
WooCommerce websites built using page builders like Elementor can use the component to add WordPress shortcodes that can be used to add the woocommerce Product Filter shortcode into any page. In Elementor, this component is called the Shortcode.
If your website is not created using page builders, you may want to add the shortcode in the WooCommerce template files in the Shop and Product catalogue pages using PHP. If you don’t have any idea of it, you should hire a WordPress or WooCommerce developer to do this for you.
Once you add the shortcode in the right place, your Shop or Product catalogue page would look like this.
Summary
Product filtering functionality is one of the most important features in an eCommerce website. However, WooCommerce doesn’t offer this feature by default. But fortunately, adding the feature to your online store is not that difficult, thanks to WC Product Filter by Themify for woocommerce price filter and woocommerce product filtering.
Want to experience what trusted eCommerce support feels like? Sign Up For A Trial
 Shares
