

How to add Wishlist in WooCommerce Stores Using a Plugin
How to add Wishlist in WooCommerce Stores Using a Plugin
Many shoppers use the Shopping Cart as a holding place to save the products for later or as a comparison table to help them make purchase decisions.
It also happens that shoppers add a particular item to the Cart with no intention to purchase it any time soon but continue to order other items.
Finding the right products takes time and effort. So, it makes sense if shoppers add the items they are interested in but don’t want to purchase right away into the Cart. However, the Cart is not meant to be used for saving favourite products. Its function is to hold the items for the current purchase.
It creates problems when you measure the cart abandonment rate because the customer didn’t add the product to the cart with the intention to buy it but rather they found interesting and saved it for later.
Ideally, an eCommerce website should have a feature that allows customers to save on or multiple lists of products they are interested in. It’s generally called Wishlist, Save for later, or Favorite items. Unfortunately, WooCommerce, despite being the most popular eCommerce platform, doesn’t offer this feature by default. In this blog, we show you how to add the Wishlist feature to a WooCommerce website.
Table of Contents
The best way to add the Wishlist feature to a WooCommerce website is by using a plugin. Creating a custom Wishlist feature requires a lot of work. There are many different free and paid plugins to add the Wishlist to WooCommerce. In this blog, we use the YITH WooCommerce Wishlist plugin.
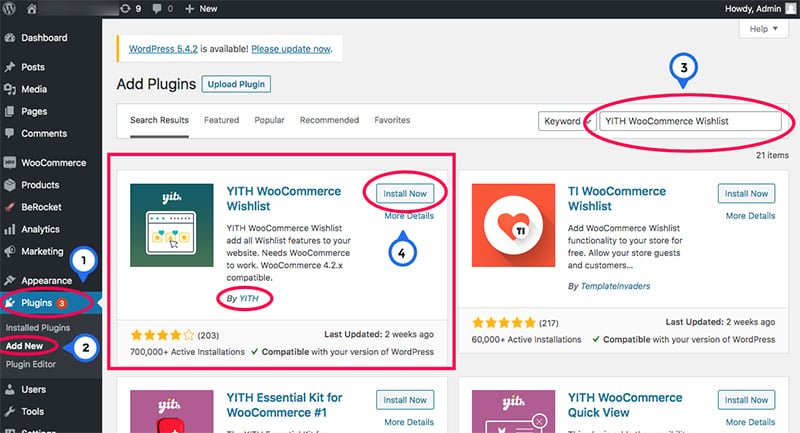
Step 1: Install the plugin
After logging in into the WordPress admin dashboard, go to Plugins > Add New to open WordPress plugin repository. In the search field, type YITH WooCommerce Wishlist and press the enter key in the keyboard.
Install YITH WooCommerce Wishlist plugin by YITH.
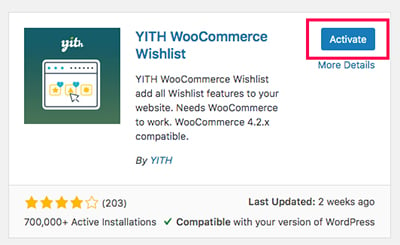
Don’t forget to activate the plugin after the installation is complete.
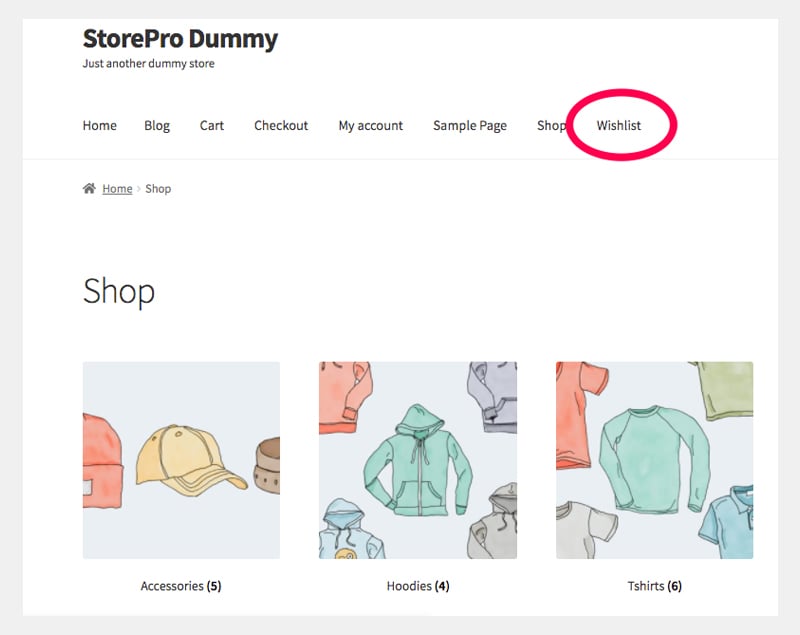
Step 2: Check Wishlist feature
Now you have successfully added the Wishlist feature to your WooCommerce store. In the top navigation section, you can see the newly added Wishlist.
WooCommerce has automatically added a Wishlist page for us. If this page is not automatically created, you can do it manually. Create a new Page and add the WordPress shortcode given by the YITH WooCommerce Wishlist plugin.
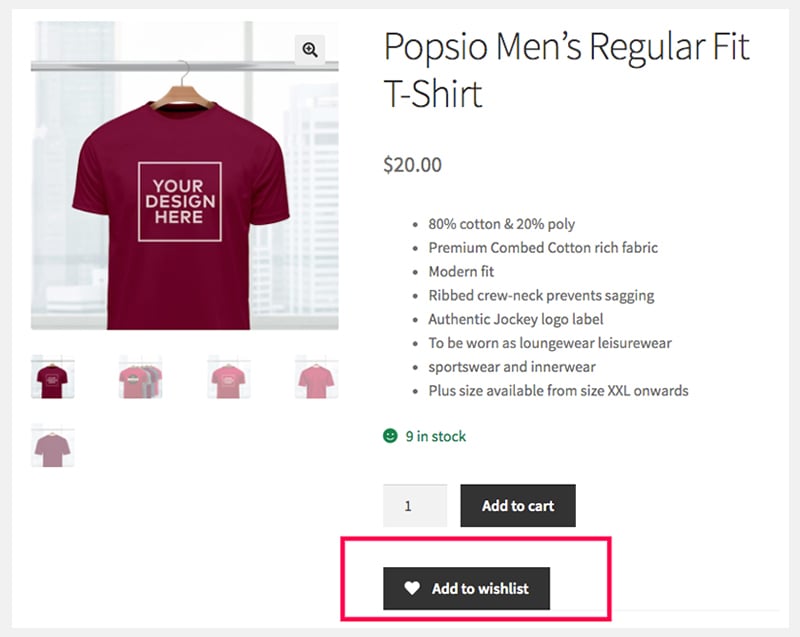
To see the Add to wishlist feature in action, go to any single product page.

You can see the Add to wishlist button at the bottom of the Add to cart button. You can change the location of this button from the plugin settings page.
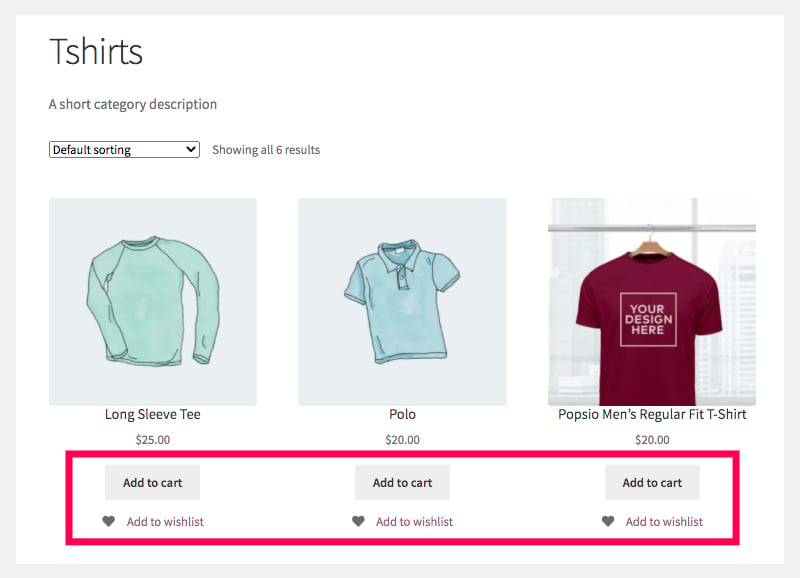
However, if you go to the Shop or Catalogue pages, you won’t see the Add to Wishlist button under the product. Let’s check how to add the Add to wishlist button on the catalogue pages as well.
Step 3: Add the Add to wishlist button on the catalogue pages
Click on YITH > Wishlist from the WordPress sidebar.
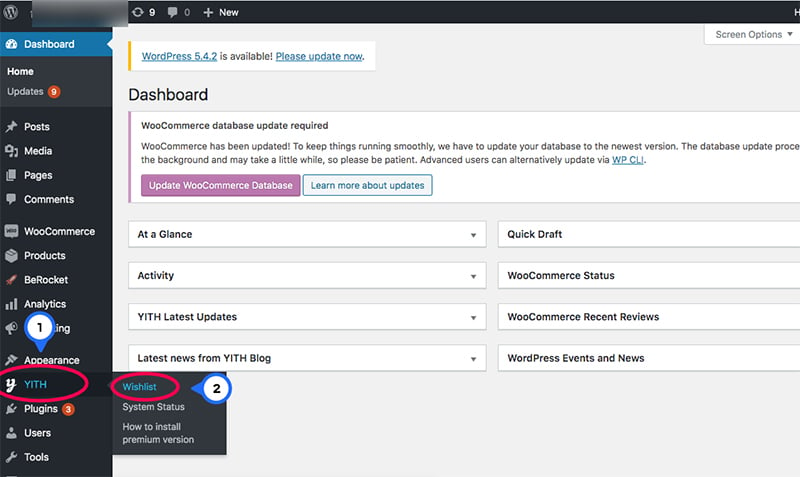
Now you are on the General Settings page of YITH Wishlist plugin.
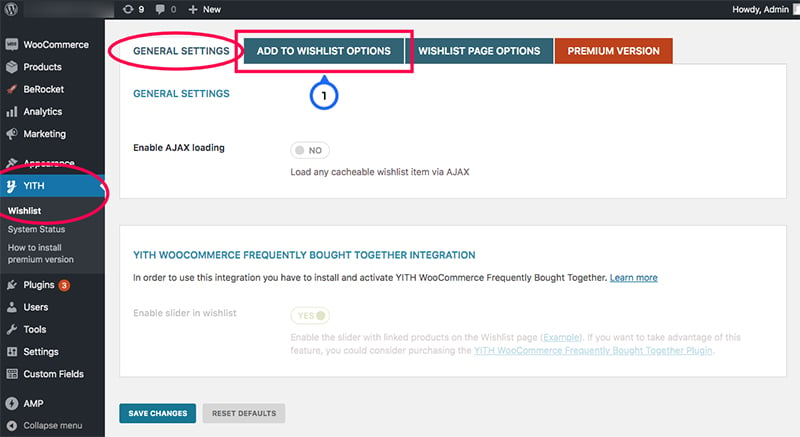
The default General Settings is good, so you don’t need to make any change on this page.
Click on ADD TO WISHLIST OPTIONS tab to open the next Settings page.
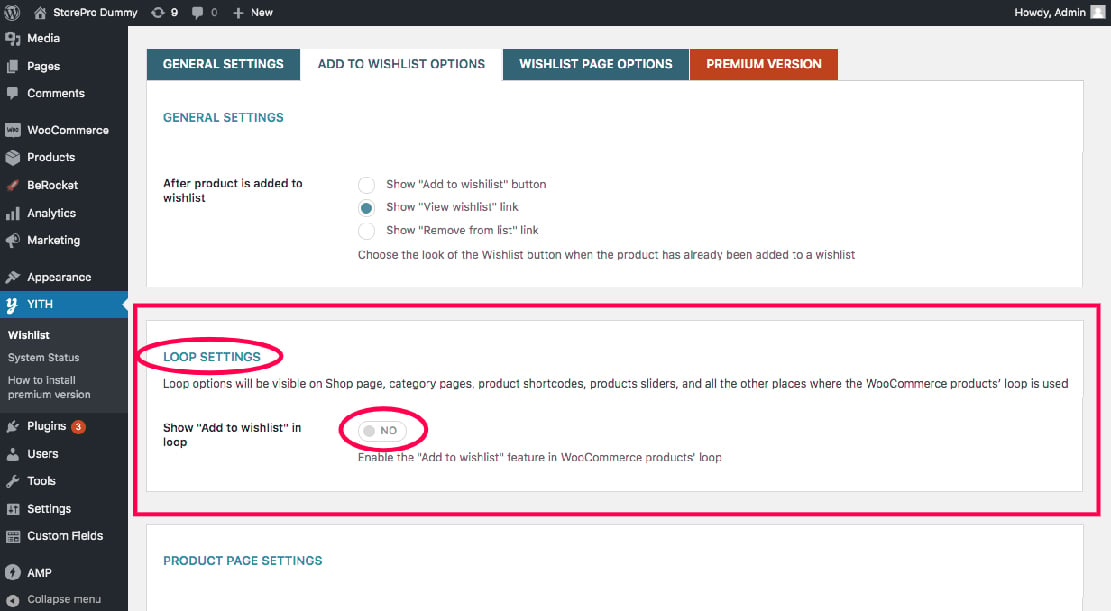
Under Loop Settings, enable the Show “Add to wishlist” in loop option.
Once you enable this option, the plugin gives you an additional setting. You can position the Add to Wishlist button in the catalogue pages.
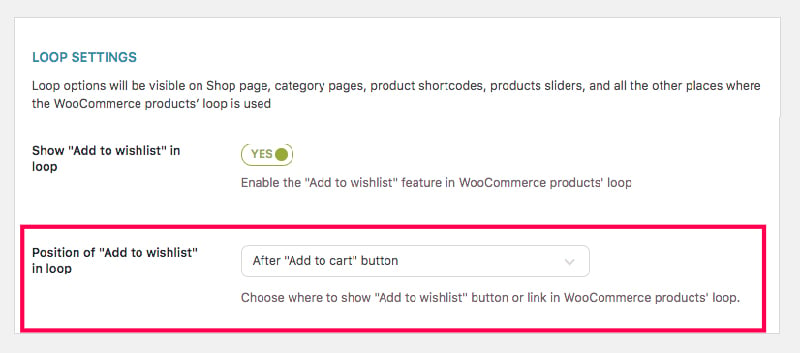
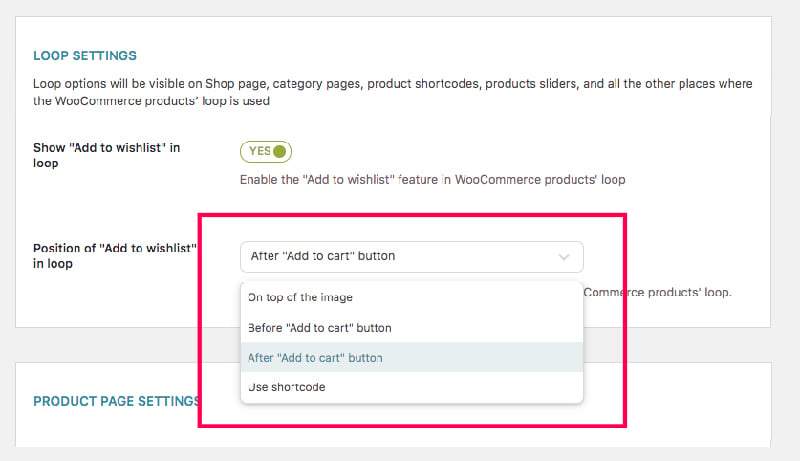
The default option is after “ Add to cart” button. This places the button below the Add to Cart button, as the name suggests.
You can also place it above the Add to cart button by choosing the Before “Add to cart” button.
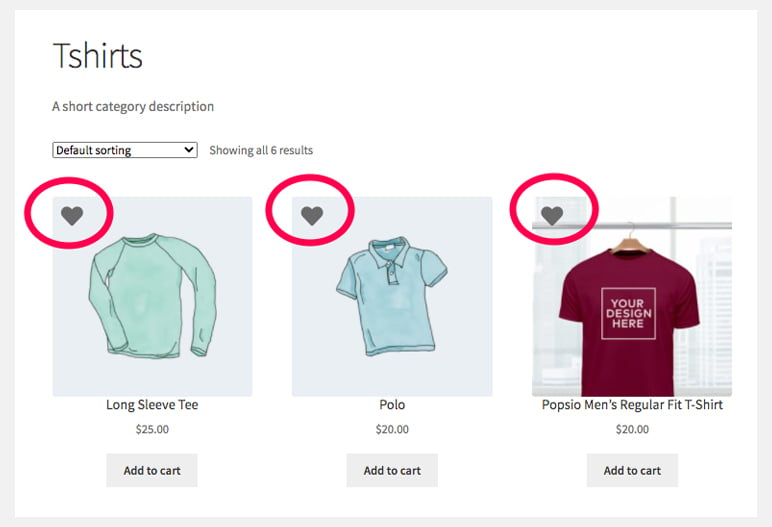
If you choose the On top of the image option, the plugin adds the button on top of the product image. This appears in the catalogue page.
Once you enable the Show “Add to wishlist” in loop option and choose the position, click on the Save changes button.
Customize the wishlist feature
Now you have successfully added the wishlist feature in your WooCommerce store. YITH WooCommerce Wishlist plugin gives you some flexibility to customize the wishlist feature to an extent.
Change the position of the Add to wishlist button on the product page.
On the ADD TO WISHLIST OPTIONS settings page, scroll down to the Product Page Settings section. Click the dropdown and choose one of the options. This lets you decide where to position the Add to Wishlist button on the single product page. The names of the options are pretty much self-explanatory.

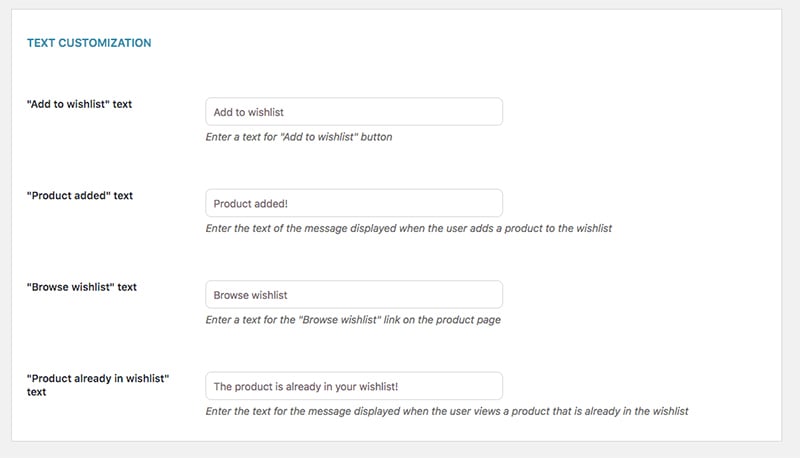
Change various text strings related to the wishlist
On the ADD TO WISHLIST OPTIONS settings page, scroll down to the Text Customization section. Here, you can change the various text strings related to the Wishlist feature.
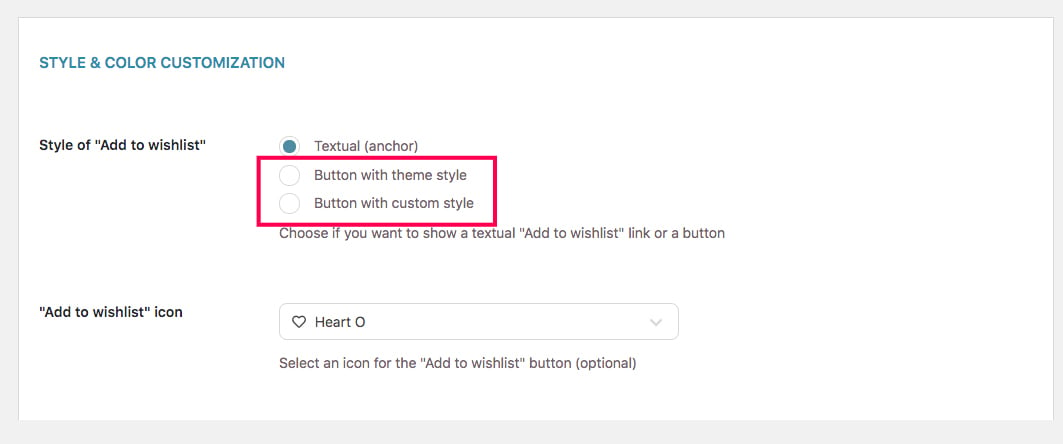
Change the style of the Add to wishlist button
If you want to change the Add to Wishlist button style, go to the Style and Color Customization section. You’ll find it on the ADD TO WISHLIST OPTIONS settings page.
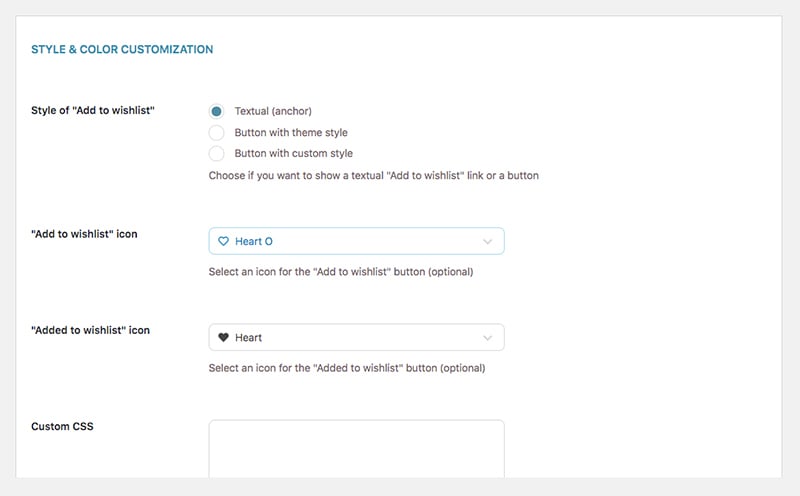
The default style of the Add to wishlist button is Textual.
If you want the Add to Wishlist button to look like an actual button, choose one of the two other options.
Button with theme style uses the default theme style for the button.
If you choose the Button with custom style option, the plugin gives additional settings. You can customize the button’s style.

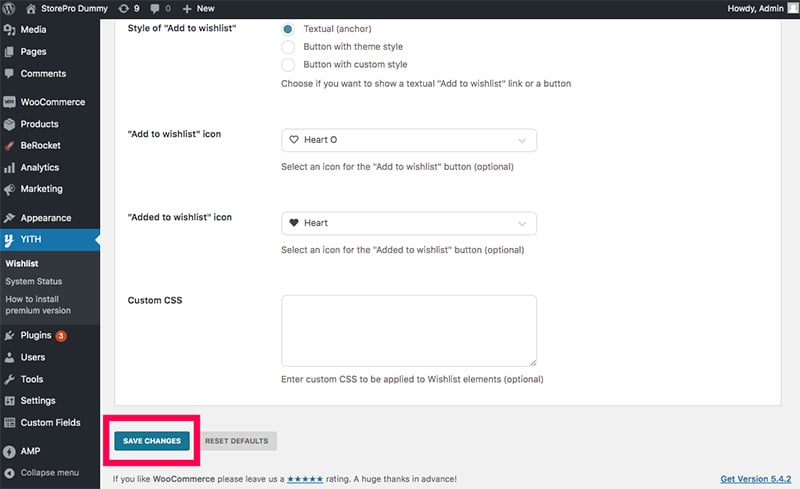
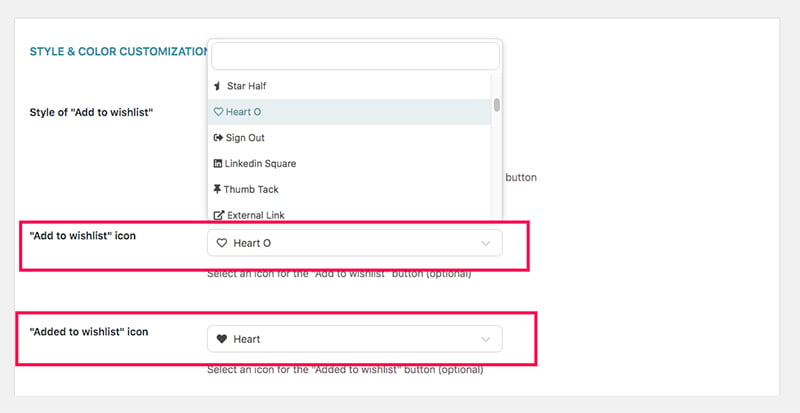
If you want to change the icon on the wishlist button, you can choose it from the drop-down.
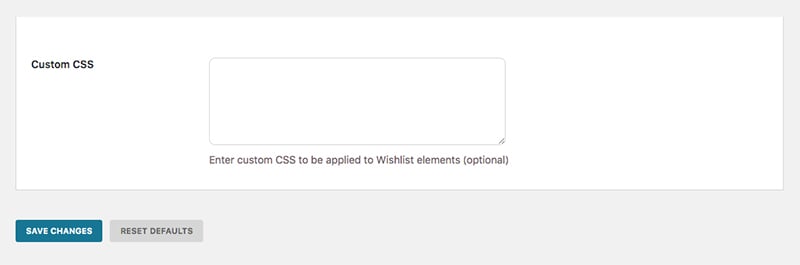
You can also customize the style of the Add to wishlist button by adding custom CSS.
Summary
Wishlist is a very useful feature in the eCommerce websites but WooCommerce doesn’t offer it by default. The best way to add this feature in the WooCommerce store is by using the YITH WooCommerce Wishlist plugin. All you need to do is install and activate the plugin.
Want to experience what trusted eCommerce support feels like? Sign Up For A Trial
 Shares
