

How to Create Coupon in WooCommerce
How to Create Coupon in WooCommerce

Discount coupons are serious business for customers and online store owners.
For businesses, it’s a key part of their strategies to
- Increase conversion rate and sales
- Capture customer contact details
- Reward customers for loyalty
- Build brand reputation
- Celebrate holidays and special days
So, if you are still not using discount coupons in your online store, you are missing out on an important weapon in your conversion arsenal to increase sales and customer loyalty.
In this blog, we show you how to create coupon in WooCommerce with the step by step instructions and a detailed guide to the coupon code settings.
How to add a discount coupon in WooCommerce
WooCommerce knows that coupon codes are an important conversion strategy in ecommerce, so it makes it easy and straightforward to create coupon codes in WooCommerce. Let’s check how to do it.
Before we start, we can set a goal.
Imagine that your online store’s first anniversary is next week. You plan to run a flash sale campaign as part of the anniversary and run social media ads to attract customers. In the ad, you offer a discount code that gives 10% off on all orders above $100.
- Coupon code: ANNIVERSARY10
- Discount type: Percentage
- Discount value: 10% of the order value
- Minimum order value: $100
- Maximum discount amount: $50
Now let’s check how to set up this coupon in WooCommerce and use it in the store.
Step 1: Go to Add new coupon page
Log in to the WordPress admin dashboard of your WooCommerce store where you can manage your online store.
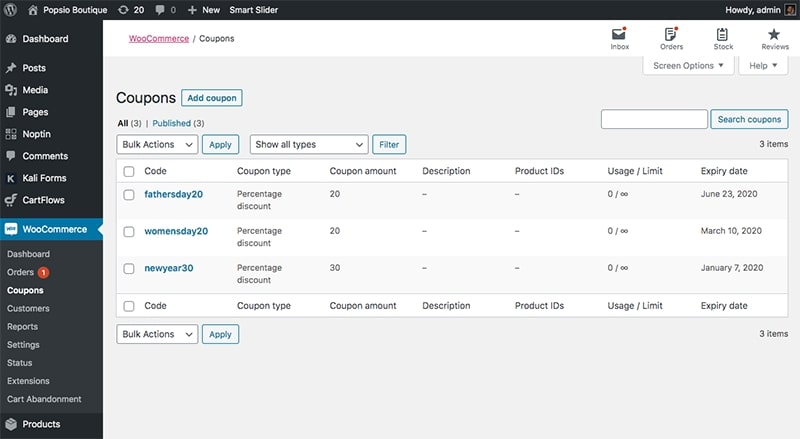
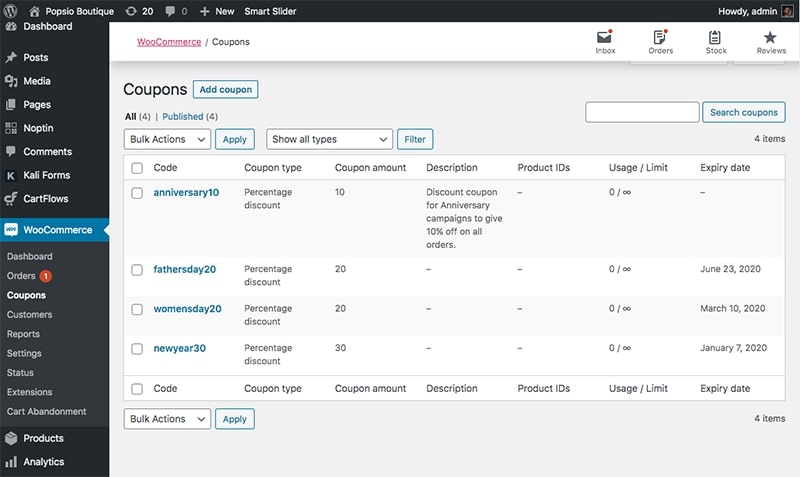
Then click on WooCommerce > Coupons to go to the coupons page. Here you can see the list of all coupons you have created so far. To start create coupon in WooCommerce, click on the Add coupon button to go to the Add new coupon page.
If this is the time you create a coupon code, you will not see this list. Instead, there will be a large box asking you to start creating a new coupon code.
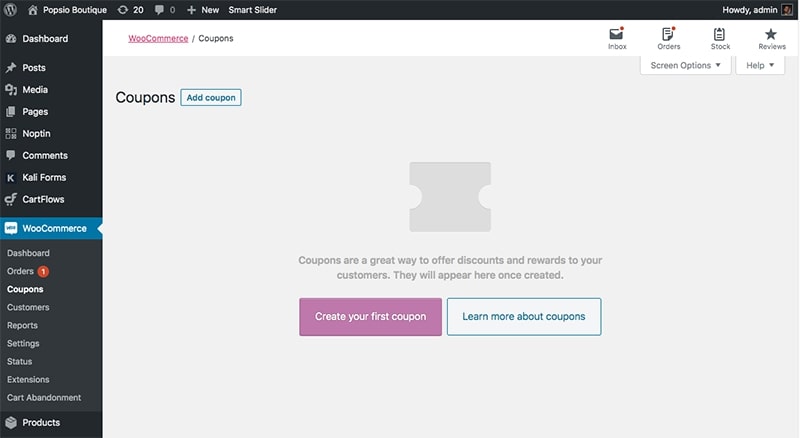
To start creating a coupon, click on the Add coupon button to go to the Add new coupon page.
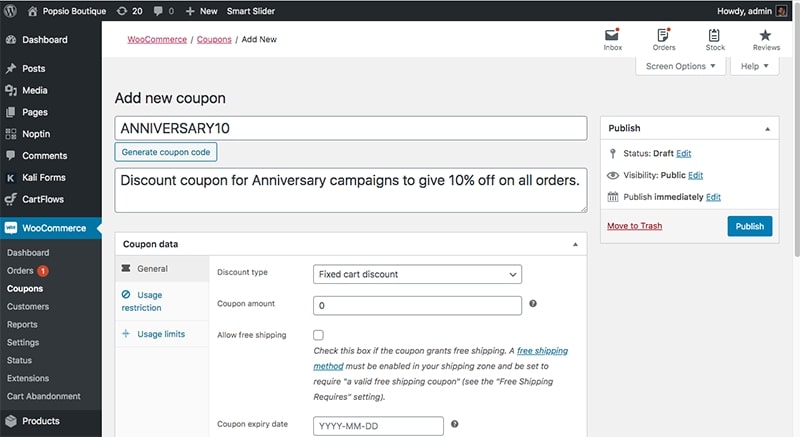
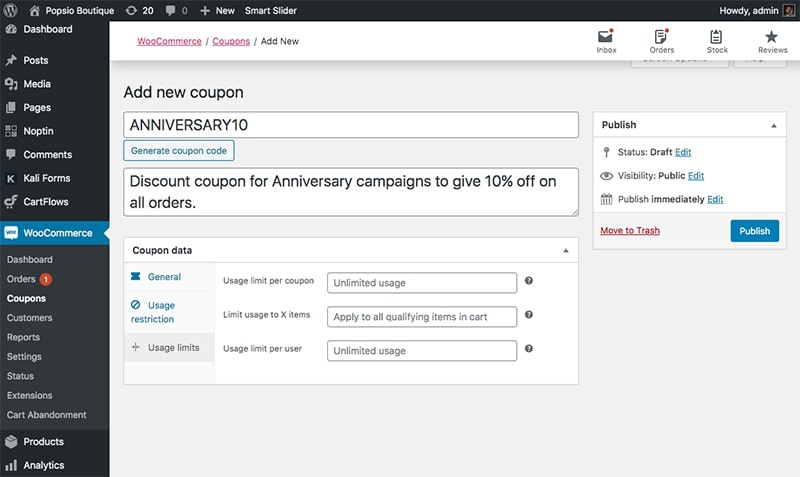
Step 2: Enter coupon code and description
In the first input field on this page, you need to enter your coupon code. Our coupon code name for the imaginary anniversary flash sale is ANNIVERSARY10. So, I will type in ANNIVERSARY10 in the field.
The second field is a description of the coupon code. It’s optional, so you don’t need to fill. However, it’s a good idea to have a description and I always fill in a short description.
Step 3: Fill in General Settings to Create a Coupon in WooCommerce
The next thing we need to do is configuring the coupon code settings. Scroll down to the Coupon data tab data choose the General tab. By default, the General tab will be open.
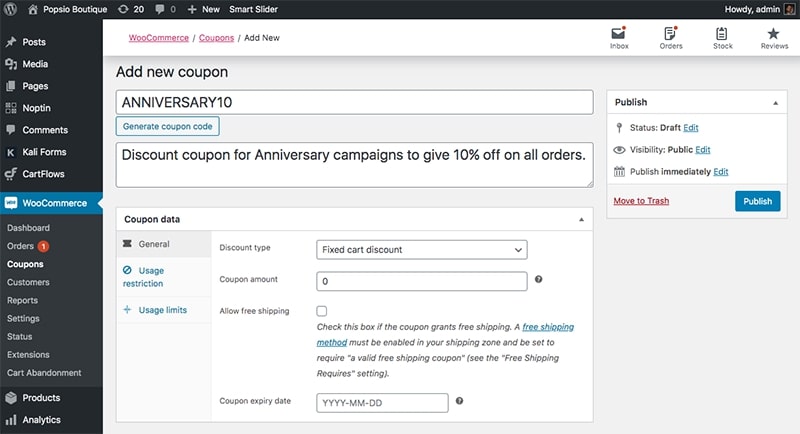
Here you have 4 settings to configure. Let’s go through each one.
Discount type
The Discount type setting helps you to choose how you want to calculate the coupon code. It gives you three options to choose from.
Percentage discount:
You can use this when you want to give a certain percentage of the total cart value as a discount.
Fixed cart discount:
You can use this when you want to offer a fixed amount discount on the entire cart.
Fixed product discount:
Use this when you want to apply a fixed amount discount to only specific items. You can choose the products you would like to give a discount on the next step.
When you create coupon in WooCommerce, selecting the right discount type is crucial depending on your goal. In our case, we want to give 10% off to the total cart value.
So, the option that we should choose is the Percentage discount.
Coupon amount
The second setting in the General tab allows you to set the discount amount.
In our case, we want to give 10% off. So, we type 10.
Please note that you don’t need to specify the percentage or currency with the discount value. WooCommerce will automatically decide it based on your discount type.
Allow free shipping
This setting allows you to choose if you want to give a Free shipping offer along with the discount. You can enable this option if you want.
However, enabling this option alone won’t add the free shipping offer to the coupon. You also need to enable Free shipping for the shipping zone and enable “Require a valid free shipping coupon” in the Shipping settings.
In our case, we don’t want to enable the free shipping option. So, we keep it unchecked.
When you create coupon in WooCommerce, always double-check these settings, especially if you’re running seasonal promotions.
Coupon expiry date
The fourth setting in the General tab enables you to set an expiry date for the coupon code.
You can run most flash sales for a short period and then deactivate the coupon. The expiry date setting helps you to deactivate the coupon after a particular date so you don’t need to do it manually.
In our case, we want to run the flash sale for one week and after that, we want to disable the coupon code. So, we can set the expiry date.
Step 4: Apply Usage Restrictions to Create a Targeted Coupon in WooCommerce
Once you complete the General settings, click on Usage restrictions to go to the Usage restrictions settings page.
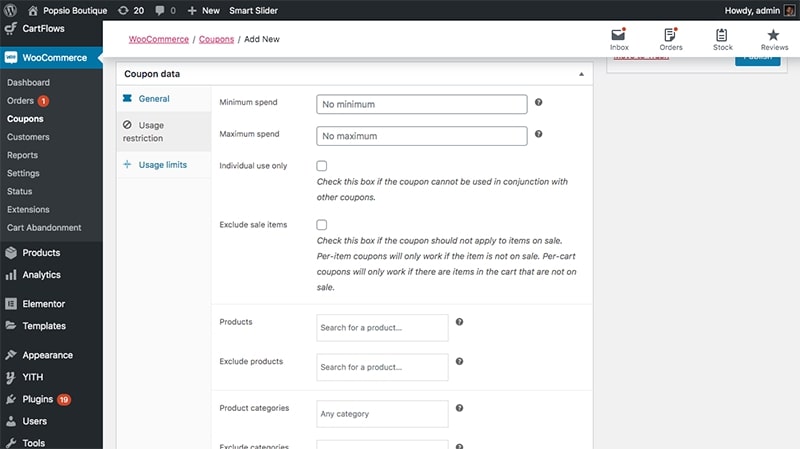
The Usage Restrictions settings appear in two sections. In the first section, you can define the conditions for the coupon code whereas the second section enables you to exclude and include products from the discount.
Minimum spend
In most cases, businesses offer discounts for purchases over a particular amount. Setting this minimum amount is useful to increase order value and keep a margin.
In our case, we want to give the discount only if the order is above $100.
Maximum spend
You can use the Maximum Spend setting to set a threshold above which the coupon doesn’t apply. It helps you to limit the maximum discount amount.
In our case, we don’t want to set any maximum limit.
Individual use only
This setting helps you to prevent the customers from using the coupon code in conjunction with other coupons. In our case, we don’t want the customer to use multiple coupons on one order. So, we check this checkbox.
Exclude sale items
This setting helps you control whether the coupon applies to products already on sale. In most cases, small businesses may not want to apply the discount coupons for products on sale because it will significantly affect the profit margin.
So, we can exclude items on sale for this coupon.
The coupon won’t apply if the cart contains at least one item on sale, since we’re applying the coupon to the entire cart.
If you choose the Fixed Product Discount as the Discount Type in the General settings, the system applies a 10% discount to all items in the cart except those on sale.
Product restriction
The second section of the Usage Restriction settings lets you include or exclude products the coupon should apply to.
You can add products and product categories in the respective fields to include or exclude them from the offer.
You can use the Allowed Emails field to create a whitelist, so the coupon code applies only to those using a listed email during checkout.
Instead of exactly specifying the emails, you can use match email notation to select emails that include particular words. Here is how to use it.
You can offer a special discount for Vodafone employees, by entering @vodafone.com in the field. This setting ensures the coupon applies only if the customer uses an email address that contains @vodafone.com.
In our case, we don’t want to use any kind of product filtering for the coupon. We want to apply the coupon for all products that are not already on sale, so we leave these columns blank.
Step 5: Configure Usage Limits to Create a Coupon in WooCommerce
Once you have defined the usage restrictions for the coupon, click on the Usage limit tab to open the Usage limits settings page.

You can set how many times the coupon can be used in your store, how many items in the cart it can apply to, and how often a user can use it.
In our case, we don’t want to put any usage limits. You can reuse the coupon an unlimited number of times until you deactivate it or it reaches the expiry date.
Moreover, the same customer can use the coupon multiple times if they want 10% off on their orders.
Step 6: Publish coupon
Click on the Publish button on the right sidebar to create and the coupon code.
You can see our new coupon in the list of coupons in the Coupons page.
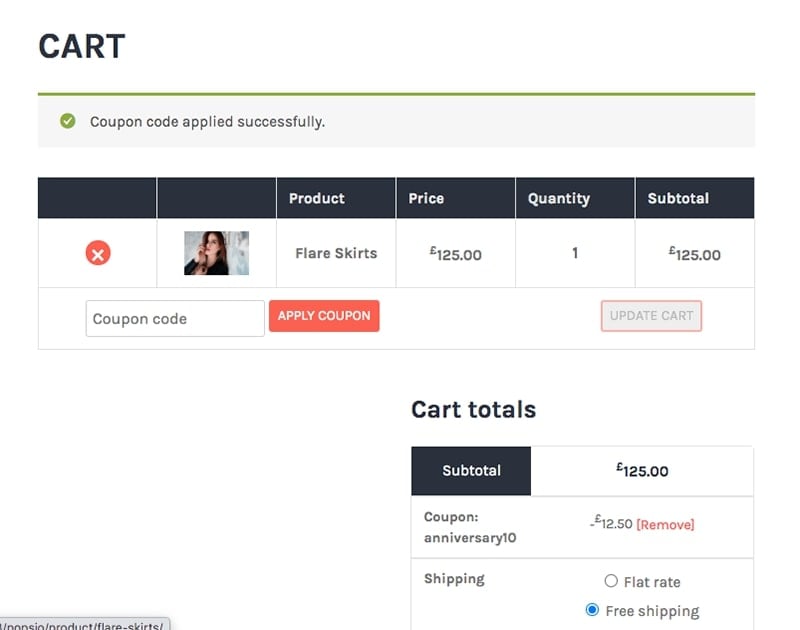
Now that you’ve successfully created the coupon code, let’s visit the store and test if the coupon works.
I have added a product in the cart and used the ANNIVERSARY10 coupon code on the cart page. As you can see, it gives 10% off which means our coupon works.
Summary
Discount coupons are an integral part of promotions in online stores. Fortunately, WooCommerce makes it very easy and straightforward to create and configure coupon codes in the online store. In this blog, we have covered everything you should know to create coupon codes in WooCommerce. If you have any doubts, feel free to comment below.
Want to experience what trusted eCommerce support feels like? Sign Up For A Trial
 Shares
