

How to Add a New User to Your WooCommerce Site: Step-by-Step Instructions
How to Add a New User to Your WooCommerce Site: Step-by-Step Instructions
March 6, 2017

Why You May Need to Add a New User to Your WooCommerce Site
- Getting WooCommerce plugin or theme support – If you are in need of support with your WooCommerce plugins or theme, you may find yourself in a position where you need to create a new user account so that a developer can access your site to troubleshoot.
Tip:
Only need to setup temporary access? We recommend you setup a copy of your site in a staging environment and grant access to that copy only, instead of your Live site.
- Delegating the tech stuff – Managing a WooCommerce site can be time consuming. You may want to devote your time to growing your business or your online store and delegate the WooCommerce tech work to a professional. If you want a friendly, talented team like StorePro to help you with your WooCommerce site, then you will need to add a new Administrator user to your site for us to use.
- Content writing collaboration – You may have different team members contributing to your site’s content. If so, you’ll want separate user accounts for each person in your content writing workflow. Typically these will be Authors and / or Editors.
- Customer Accounts – You may want to setup a Customer account for your WooCommerce customers or Subscriber accounts for users to receive updates to your blog.
Common Ways to Add New Users in WordPress
There are two common ways to add new users on your WordPress site:
- User self-registration. You’ll typically enable this for people to subscribe to updates on your blog or to create an account for their WooCommerce activity.
- The second, and the focus of this article, is a manual user creation process for one of the purposes mentioned above. Read on for step-by-step instructions to manually setup a new WordPress user account.
Steps to Add a New User on Your WordPress Website
Now, let’s get going! Follow these steps to add a new user manually:
- Navigate to your dashboard and click on ‘Users » Add New.’
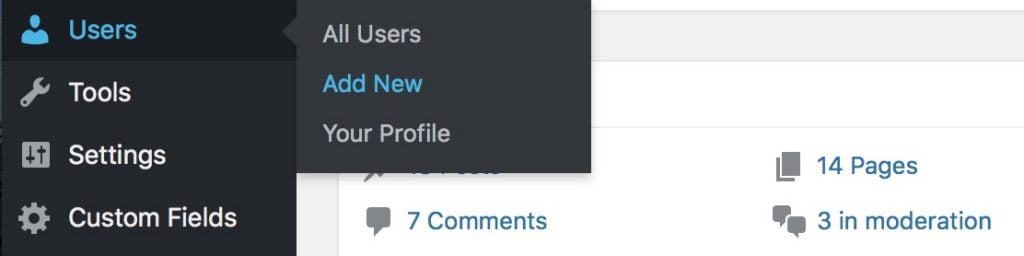 You will be presented with a form much like this one:
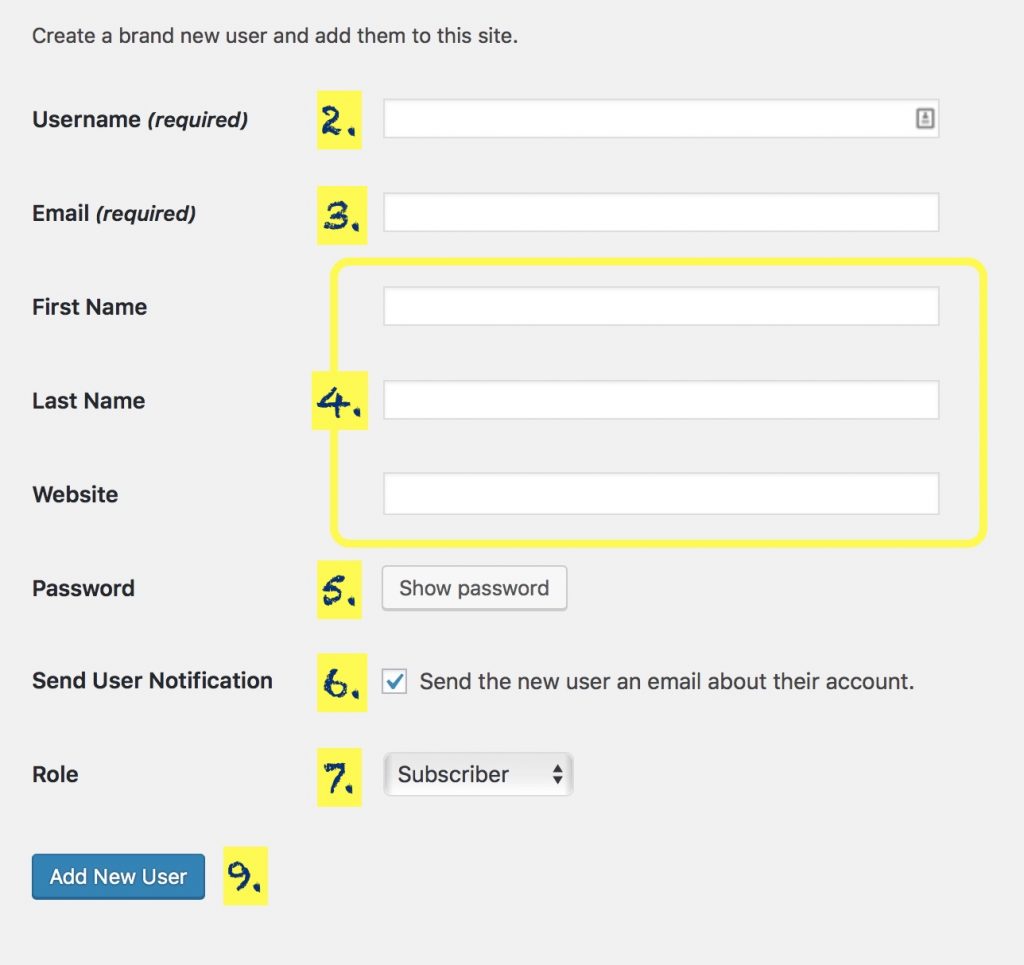
- Select a username and enter it here. Try to use something that will be easily identifiable in the future and easy to remember. For example, if you are setting up an account for StorePro to maintain and grow your WooCommerce store, you might simply choose a username of storepro.
- Next you will enter the user’s email address. Be very careful to ensure accuracy. This is the email address users will be relying on for password resets or other account related notifications. If you are setting up an account for StorePro, you can enter agent@storepro.io.
- The following fields are not mandatory, but are nice to have if applicable:
- First name
- Last name
- Website address for the user (if applicable). e.g. ‘https://storepro.io‘
- Next is the Password field. WordPress now does the heavy lifting of automatically creating a strong password for you. Click the ‘Show password’ button in order to make note of the password. You can also change the password here if you don’t like it.
Tip:
A tool we keep in our Super Hero tool-belt for generating strong passwords and securely sharing them with others is LastPass. - Check the box to send the password to the user via email. The user will receive their login information on the email address you specified above
- Finally, select the role for this new user. Each user role comes with different set of capabilities ranging from Subscriber (with the least amount of privileges) to Administrator (with the most privileges). Choose the role with the least amount of privileges that will still enable the user to perform the intended tasks on your website. Be sure to select ‘Administrator’ if you are setting up an account for StorePro to manage your site.
- Depending on the setup of your WordPress or WooCommerce site, you may have additional options on this screen. For example, if you are using an Affiliate system, you may be presented with related options. Complete these fields according to your needs.
- Press the Add New User button
- Navigate to your dashboard and click on ‘Users » Add New.’
- That’s it! Well done, your new user account is created.
 If you need help with these steps or are in need of additional WooCommerce support, start a Support Trial today!
 Shares
Store Pro is your global e-commerce technology partner. We help you build, optimize, and grow engaging online stores on WooCommerce, Shopify, Magento, and Ecwid. From strategy to development, we’re here to power your e-commerce success.
STATUS: Agents Operational
